Lightspeed Cloud offers two complementary ways to protect your VMs: point-in-time snapshots and policy-driven backups. Snapshots are best for quick, manual checkpoints before a risky change; backups are better for ongoing, scheduled protection.
Instance and volume snapshots
There are two distinct kinds of snapshot in Lightspeed Cloud: instance snapshots, which capture an entire VM, and volume snapshots, which capture a single disk. They're triggered from different places and suit different situations.
An instance's menu has two separate snapshot buttons: Take Snapshot for an instance snapshot of the whole VM, and Take Volume Snapshot for a snapshot of one attached disk. Instance snapshots you've taken are listed on the instance itself; volume snapshots are found under the Storage menu against the relevant volume, not on the instance.
| Feature | Instance (VM) snapshot | Volume snapshot |
|---|---|---|
| Scope | Entire virtual machine (all attached disks) | A single target block storage volume |
| Memory capture | Not currently supported on Lightspeed Cloud | No, only captures data at rest |
| Storage location | Keeps data on the primary storage pool | Backed up and exported to secondary storage |
| Automation | Manually triggered via the VM management console | Supports automated recurring policies (hourly, daily, etc.) |
| Main use case | Quick rollback before risky OS upgrades or changes | Long-term backups, disaster recovery, and template creation |
To take an instance snapshot, open the VM and choose Take Snapshot. You can revert a VM to a previous snapshot from the VM's snapshot list at any time.
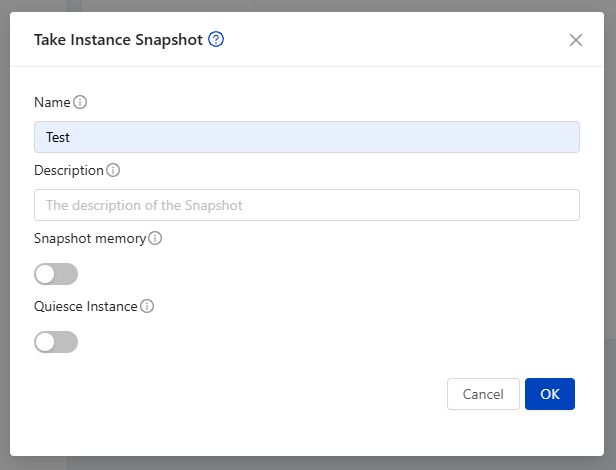
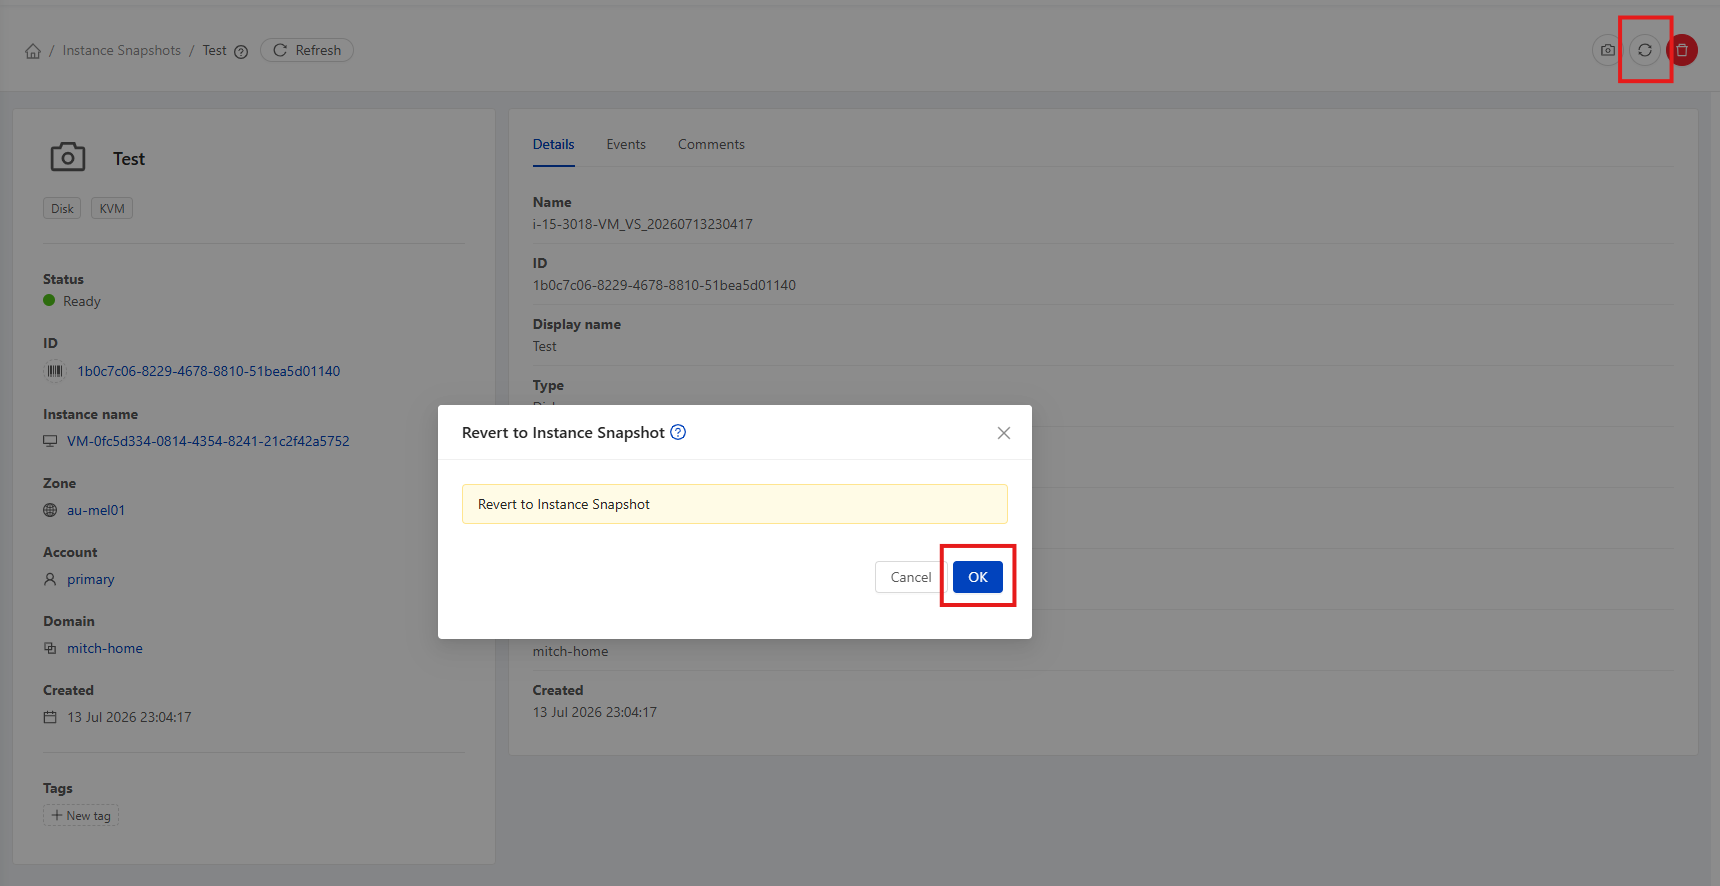
Volume snapshots are covered in detail under Storage & Volumes, including recurring snapshot policies.
Backup offerings
Backups are managed through a backup offering. If your account has one available, you can assign it to a VM from its detail page: open the VM and use the Assign Instance to backup offering action.
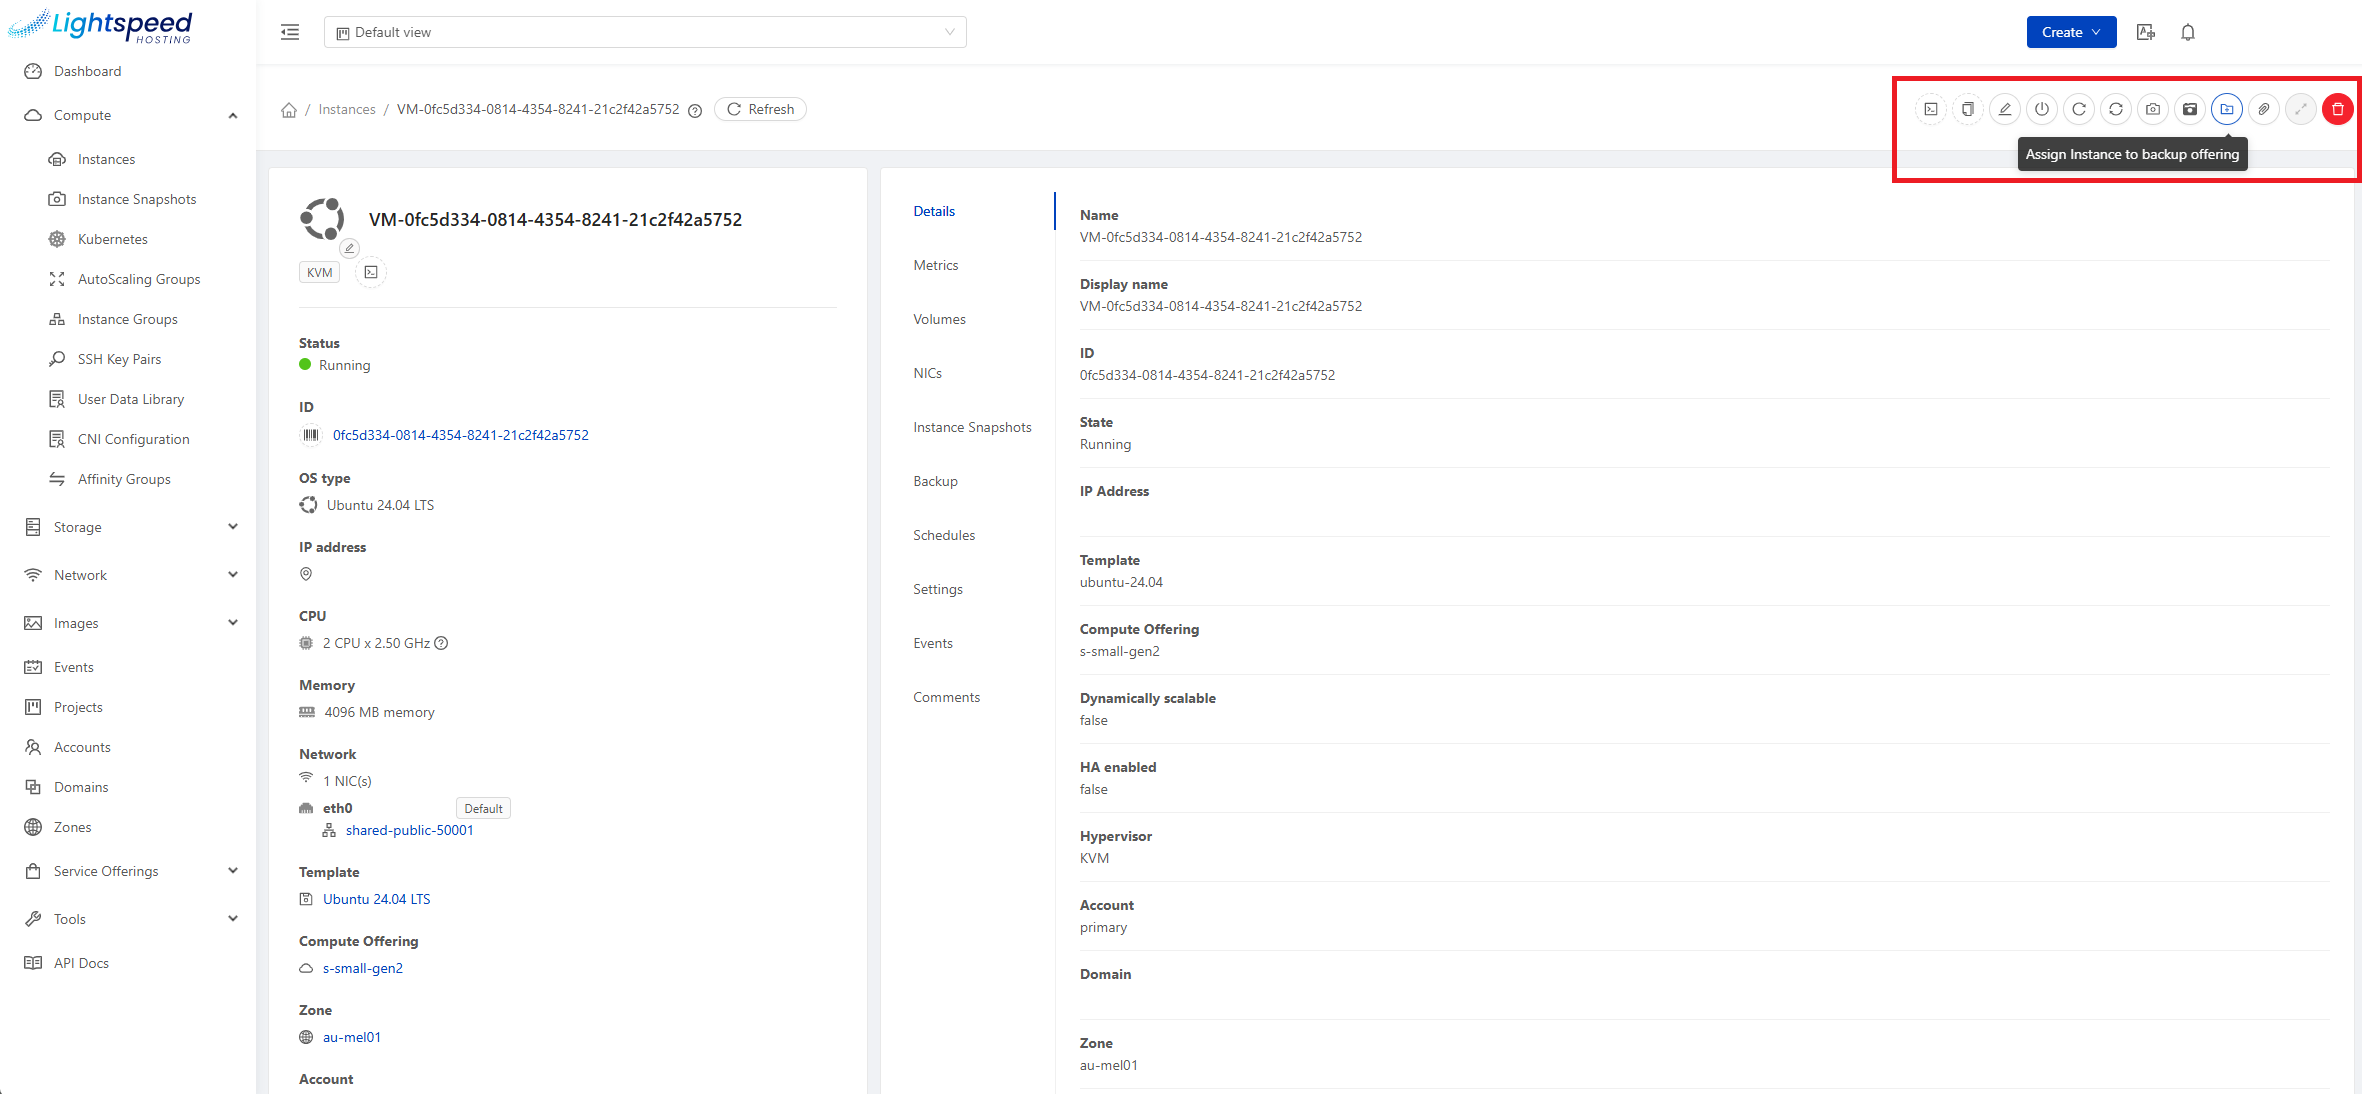
Choose the offering to apply and confirm:
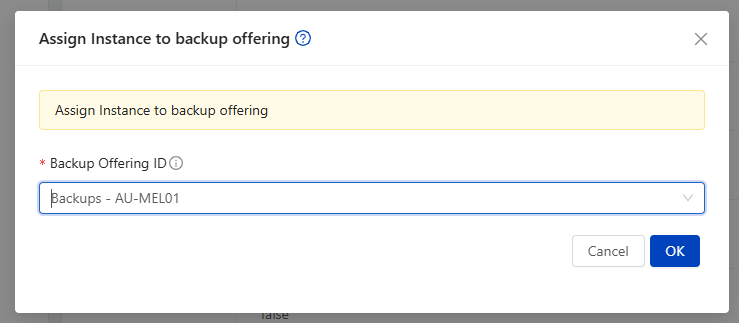
Assigning the offering doesn't start anything on its own - it makes two new actions available on the VM: taking a backup on demand, and setting up a recurring schedule. You configure whichever you want from there.
Taking and restoring backups
Once a VM has a backup offering assigned, use the Start Backup action to take a backup immediately - give it a name and description, and optionally enable Quiesce Instance.

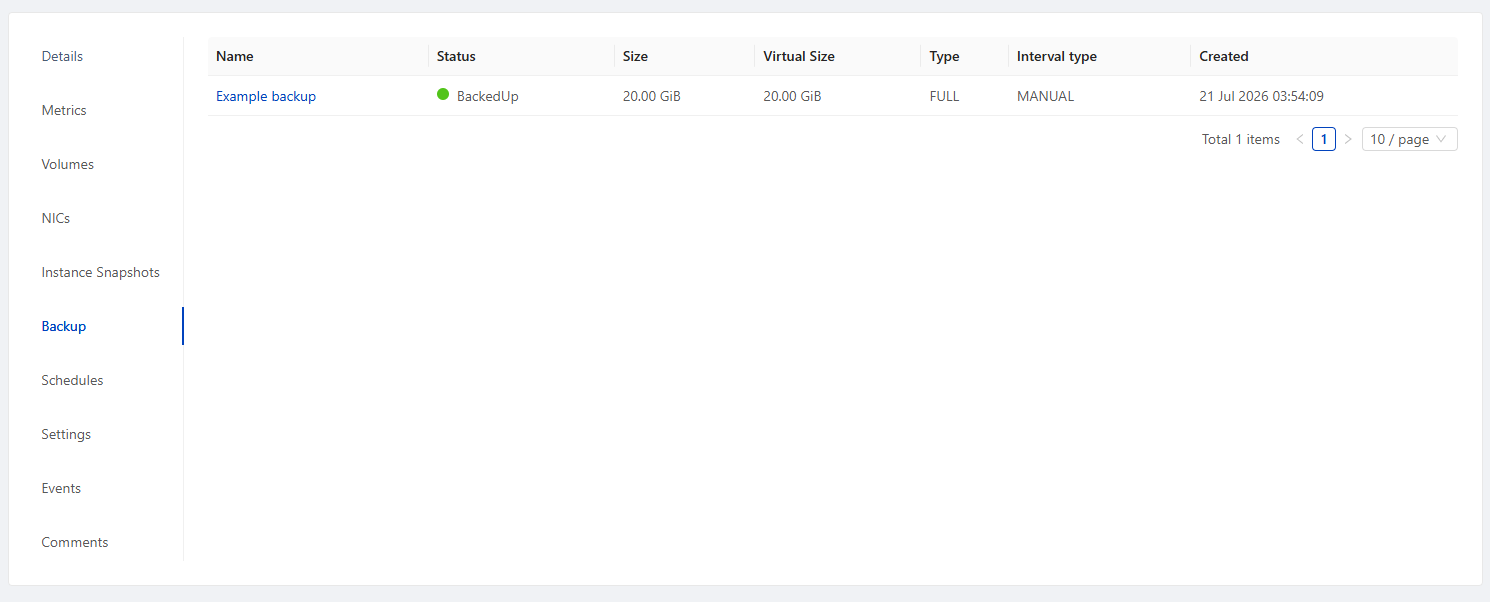
Backups you've taken are listed under the VM's Backup tab, showing status, size, backup type, and when each one was created:
To restore from an existing backup, you have two options:
- Restore in place - roll the existing VM back to the state captured in the backup.
- Create a new instance from backup - spin up a brand-new VM from a backup, leaving the original untouched. This is useful for recovering an individual file without disrupting the live VM, or for cloning a known-good state.
Setting up a backup schedule
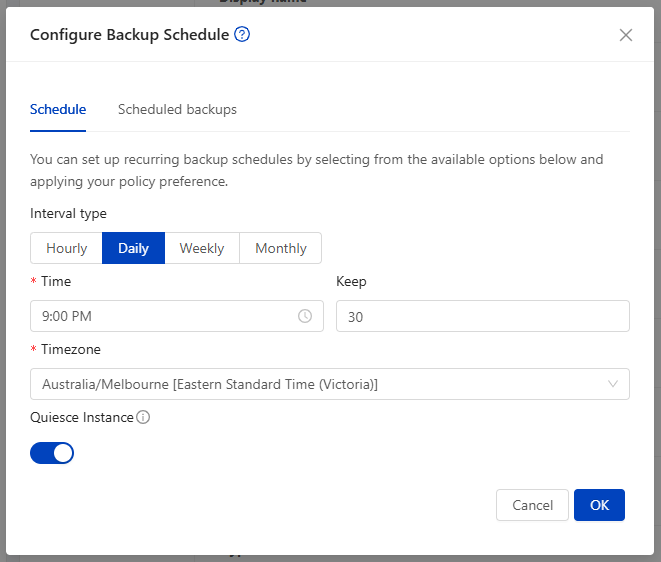
For ongoing protection without having to remember to run backups yourself, use the Configure Backup Schedule action on the VM.

On the Schedule tab, choose how often backups should run (hourly, daily, weekly, or monthly), the time and timezone, and how many recent backups to keep. Quiesce Instance is available here too, same as for an on-demand backup.
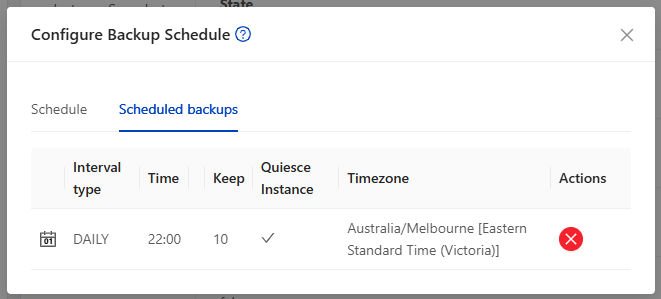
Existing schedules for the VM are listed on the Scheduled backups tab of the same dialog, where you can also remove one:
Choosing between snapshots and backups
As a rule of thumb: use snapshots for short-lived, "just in case" checkpoints around a change you're about to make, and rely on a backup offering for ongoing protection against accidental deletion, corruption, or the need to recover from further back in time.